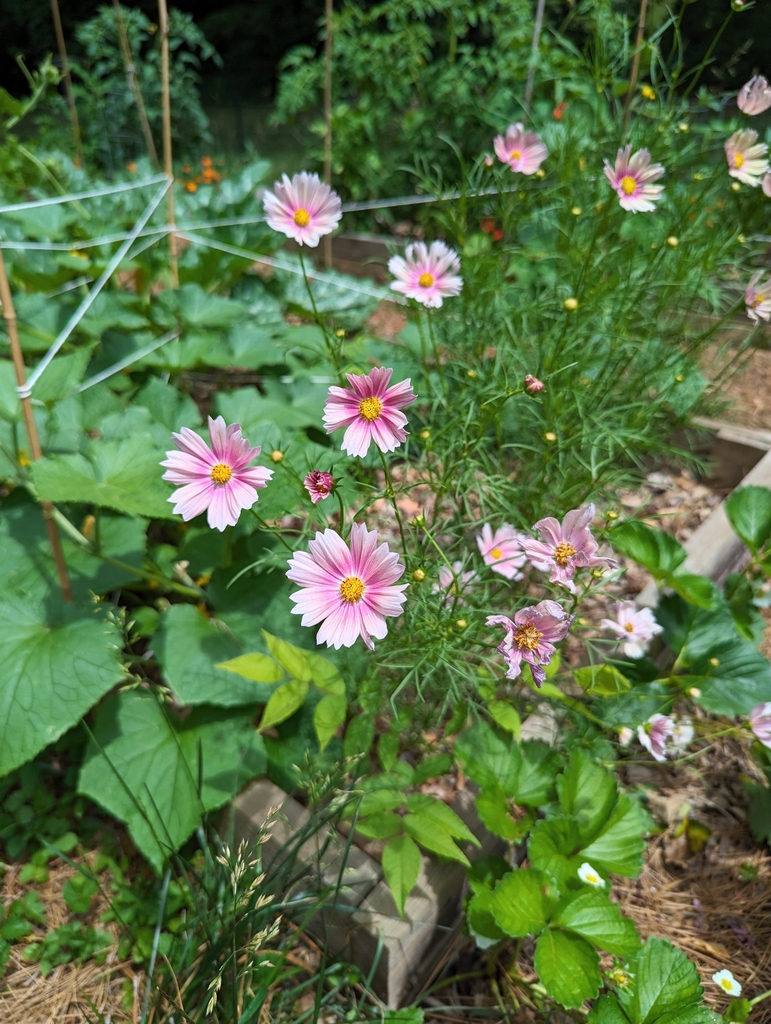
An annual flower that appears again next year has not survived winter. Its offspring have. That distinction explains why a “self-seeding” border can look effortless for several seasons and then suddenly thin out, move across the garden or change colour. If you want reliable return, the work is not keeping the old plant alive. It is helping enough viable seed reach suitable soil at the right time.
Annual, biennial and perennial describe life cycles
The Royal Horticultural Society defines annuals as plants that germinate, grow, flower, set seed and die within one year. Biennials usually build leaves and roots in their first growing season, then flower, set seed and die in the second. Perennials live for more than two years, although their stems may disappear in winter. RHS annuals and biennials overview
Garden labels often blur those definitions because climate changes behaviour. A tender perennial may be sold as an annual where frost kills it. A short-lived perennial may vanish after two or three seasons but replace itself by seed. A true annual remains annual even when a carpet of its descendants occupies the same patch every summer.
That matters when planning. A perennial returns from the existing crown, roots, bulb or rhizome. A self-seeding annual returns only if the previous generation produced viable seed and conditions allowed germination. If you mulch deeply, remove every spent flower, hoe the seedlings or experience an unusually wet winter, the apparent “returning annual” may not return at all.
Choose plants that suit both the site and the gardener
Common self-seeding annuals include calendula, cornflower, cosmos, love-in-a-mist, opium poppy where legal, California poppy, borage and annual honesty relatives. Nasturtiums and sunflowers may also volunteer, though seed survival varies. Select by sunlight, moisture, soil and winter conditions rather than by a universal list.
Cosmos bipinnatus prefers sun and well-drained soil and can readily reseed where seed reaches open ground. NC State Extension notes that rich soil may produce tall, weak plants with fewer flowers and that seed planted too deeply may struggle. The species can also spread beyond the intended bed, which is a reminder that “self-seeding” and “well behaved” are not synonyms. NC State Extension: Cosmos bipinnatus
Before planting, check whether a species is invasive or legally restricted in your region. A plant celebrated in one country can escape into natural habitat in another. Local extension services, botanic gardens and environmental agencies are better guides than a list written for a different climate. In a small garden, choose species whose seedlings are easy to recognise and pull.
Self-seeding requires you to stop deadheading
Removing faded flowers redirects some plants toward more blooms and keeps a display tidy. The RHS recommends regular deadheading for many annuals. But a flower removed before the seed ripens cannot seed the next generation. The practical compromise is to deadhead early for continued flowering, then leave selected healthy plants to mature seed later in the season. RHS guide to growing annuals and biennials
Choose several strong plants rather than one, especially if you want a varied population. Mark them before the petals fall so a helper does not tidy them away. A ripe seed head often becomes dry, papery or brown, but the exact sign differs by species. Watch closely: capsules can open or birds can feed just as the seed reaches maturity.
Leave some seed to fall naturally and collect some as insurance. Natural dispersal finds surprising gaps, while stored seed lets you repair a poor year or control placement. Shake a few mature heads over lightly prepared soil, then label the area. Without a label, emerging seedlings are easily mistaken for weeds in spring.
Collect seed dry, label it and expect variation
The RHS advises collecting from healthy plants on a dry day, placing seed heads in paper bags and drying them before storage in labelled packets. Timing varies, but many seed heads ripen from late summer into autumn. Store clean, dry seed somewhere cool and dry, protected from rodents and moisture. RHS seed collecting and storing guide
Write the species or cultivar, colour, location and year on the packet. A photograph of the parent plant can help. Do not assume seedlings will be identical: open-pollinated species can cross with nearby relatives, and cultivars may vary. Seed saved from F1 hybrids is especially unlikely to reproduce the uniform features of the purchased parent.
Variation is not necessarily failure. A self-seeded patch may produce new heights or shades that suit an informal garden. If exact colour, height or flowering time is essential, buy fresh seed of a stable named line or propagate the plant by the method recommended for that cultivar. Self-seeding is best understood as controlled surprise, not cloning.
Prepare enough open soil for seedlings to win
Seeds need contact with a suitable growing surface. A dense lawn, thick bark mulch or crowded groundcover leaves little opportunity. In autumn or spring, expose small patches of soil with a hand rake rather than turning the whole bed. Many annual seeds are small and should be pressed into the surface or covered only lightly; follow species-specific instructions.
Hardy annuals tolerate some cold and may be sown outdoors in autumn or early spring in suitable climates. Half-hardy annuals such as cosmos are generally sown after frost risk or started under protection. The RHS stresses that local conditions and the instructions on the seed packet should determine timing. RHS spring sowing for hardy annuals
Water with a gentle rose so seed is not washed into piles. Once seedlings appear, learn the cotyledons and first true leaves of the plants you want. Thin crowded clumps to reduce competition and improve airflow. Move or remove volunteers that block paths or smother less vigorous plants. “Naturalistic” still benefits from editing.
Why a self-seeded display fails
The most common failure is simple: flowers were cut or deadheaded before producing mature seed. Other causes include seed buried too deeply, seedlings removed during weeding, heavy mulch, drought after germination, waterlogged soil, hungry slugs, poor seed viability and a winter outside the species’ tolerance. A warm spell can also trigger germination before damaging frost.
Look for the missing stage instead of assuming the plant “did not like the garden.” Did seed form? Did it fall? Was bare soil available? Did seedlings emerge and disappear? A few photographs through the season make diagnosis easier. If no seed matured, collect or buy seed. If seedlings appeared and vanished, protect them or change sowing time. If plants grew but did not flower, inspect light, soil fertility and crowding.
Weather makes reliability impossible. Keep a small reserve packet even when natural seeding works well. In spring, sow into gaps rather than scattering the entire supply. The reserve turns a volunteer system from all-or-nothing into a garden you can steer.
A simple three-year approach
In year one, sow modest drifts of two or three species suited to the site. Deadhead most plants for a long display, but mark several vigorous examples to set seed. Collect part of their seed and allow part to fall. Map the patches before winter.
In year two, wait before cultivating those areas. Identify seedlings, thin them and move a few while small. Fill genuine gaps with stored seed. Note which species volunteer too aggressively, which disappear and which produce useful combinations. Remove unwanted seed heads before they mature so the experiment does not become a permanent burden.
By year three, the border tells you what the site can sustain. Keep the successful populations, introduce fresh seed if vigour or variety declines, and stop encouraging plants that demand too much control. The reward is not annuals that magically become perennial. It is a renewable display built from seed, observation and just enough intervention.